

Imagine upgrading your kitchen’s efficiency with just a few simple DIY projects—did you know it could increase your workspace efficiency by up to 50%? This not only saves time but also transforms your cooking space into a sanctuary of productivity and style. Let’s explore how these cleverly designed projects can make your kitchen truly functional.
DIY kitchen projects have a long history rooted in resourcefulness and innovation. From mounting pegboards for easy access to utensils to installing pull-out drawers to maximize storage, these upgrades are both practical and accessible. In fact, a survey from 2022 found that 65% of homeowners undertaking kitchen renovations included DIY projects to cut costs and add a personal touch.
Understanding the Importance of a Functional Kitchen
A functional kitchen is the heart of a home, offering more than just a place to cook. It’s where you gather with family, experiment with new recipes, and create lasting memories. Having a well-organized kitchen makes all these activities more enjoyable.
Efficiency is a key benefit. When everything is in its place, you spend less time searching for utensils and ingredients. A functional layout can save you precious minutes during meal preparation.
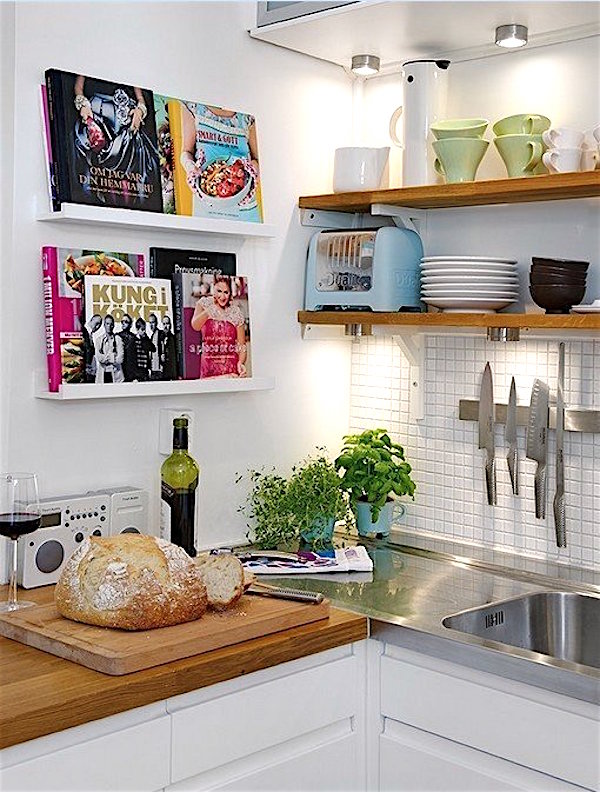
Moreover, a functional kitchen enhances safety. Proper storage and organization reduce the risk of accidents. For instance, keeping knives in a designated slot prevents mishaps.
Financially, a well-organized kitchen can be a smart investment. It increases the value of your home and makes it more appealing to potential buyers. In essence, a functional kitchen offers both immediate and long-term benefits.
Health Benefits of a Functional Kitchen
A well-organized kitchen encourages healthier eating habits. When your kitchen is tidy, cooking at home becomes easier and more inviting. This reduces the temptation to order takeout or eat unhealthy snacks.
Fresh ingredients and spices are within easy reach, making healthy cooking quicker and more efficient. You’re more likely to whip up nutritious meals when everything is accessible. In turn, this promotes overall well-being.
Additionally, a clean and functional kitchen helps in maintaining hygiene. Proper storage of food items prevents contamination. Regular cleaning becomes less of a chore when everything has its place.
Psychological Impact of a Functional Kitchen
An organized kitchen can also have a positive impact on mental health. Clutter and disorganization can lead to stress and anxiety. Conversely, a tidy kitchen creates a calming environment.
Knowing where everything is reduces daily frustrations. It enhances your cooking experience, making it a stress-free activity. This sense of order can improve your overall mood and well-being.
Moreover, a functional kitchen can foster creativity. With a well-organized space, you can experiment with new recipes and techniques. This can bring a sense of accomplishment and joy.
Breaking Down the Process: DIY Kitchen Projects
Tackling DIY kitchen projects can seem daunting, but the right approach makes it manageable and fun. These projects not only improve functionality but also add a personal touch to your space. Let’s explore some exciting DIY ideas to revamp your kitchen.
Step 1: Planning Your DIY Kitchen Project
Before diving into any project, planning is essential. Start by identifying the areas of your kitchen that need improvement. Make a list of materials and tools you will need for the project.
Next, consider your budget. Being clear about how much you’re willing to spend can help you make informed choices. Look for materials that fit within your budget without compromising on quality.
Finally, create a timeline. Breaking down the project into smaller tasks can make the process less overwhelming. Set realistic deadlines for each phase to stay on track.
Step 2: Gathering Tools and Materials
Having the right tools and materials is crucial for the success of your DIY project. Some basic tools you might need include a hammer, drill, measuring tape, and screwdriver. Make sure to gather all necessary items beforehand.
- Hammer
- Drill
- Measuring tape
- Screwdriver
Next, choose your materials wisely. Opt for durable and high-quality materials that will stand the test of time. Whether it’s wood for your cabinets or paint for your walls, make sure it fits your kitchen’s style.
If uncertain about your choices, consider seeking advice from a hardware store professional. They can offer insights and recommendations tailored to your project. Taking this step ensures you’re well-prepared and confident moving forward.
Step 3: Execution and Finishing Touches
Now that you’ve planned and gathered your materials, it’s time to execute your project. Begin with the foundational steps, like measuring and cutting, to ensure accuracy. Follow each task sequentially, without rushing.
Once the main work is done, add finishing touches to perfect your project. Small details like new handles for cabinets or a fresh coat of paint can make a significant difference. These touches help bring your vision to life.
Finally, clean up and organize your workspace. A tidy environment makes it easier to appreciate your hard work. Take a moment to enjoy your newly improved and functional kitchen.
DIY Project Idea 1: Custom Drawer Organizers
Custom drawer organizers can transform cluttered drawers into organized spaces. They help you keep utensils, gadgets, and other kitchen tools in order. This makes cooking more efficient and enjoyable.
To start, measure the inside of your drawers to determine the size of the organizers. You can use materials like wood or acrylic to build the dividers. Cut the materials according to your measurements, ensuring a perfect fit.
- Wood
- Acrylic
- Measuring tape
- Saw
Now, assemble the dividers using screws or glue. Make sure they are secure and stable. Once assembled, place the organizers inside the drawers and arrange your items.
The custom drawer organizers not only save space but also add a personal touch to your kitchen. They can be decorated or painted to match your kitchen’s style. With everything neatly stored, your kitchen will be both functional and aesthetically pleasing.
DIY Project Idea 2: Overhead Pot Racks
Overhead pot racks are an excellent way to free up cabinet space and keep your cookware within reach. They add a professional touch to any kitchen and make it easier to locate the pots and pans you need. Best of all, they’re relatively easy to install.
First, choose a suitable location for your pot rack. It should be accessible yet out of the way to prevent head bumps. Common places include above the kitchen island or near your cooking area.
- Kitchen island
- Cooking area
- Above countertops
Next, select a sturdy rack that can hold the weight of your pots and pans. Make sure to use heavy-duty anchors and screws for safety. Proper installation is crucial to avoid accidents.
Once you have your rack and hardware, mark the spots on the ceiling where you’ll drill. Use a level to ensure it’s even. Then, drill the holes and install the anchors.
Hang the rack securely and test it by hanging some lightweight pots first. This ensures everything is stable. Gradually add more cookware once you’re confident in its sturdiness.
With an overhead pot rack, you not only gain extra storage but also create a more efficient cooking space. It’s a practical and stylish upgrade that anyone can achieve. Plus, it keeps your kitchen looking organized and professional.
DIY Project Idea 3: Pull-Out Shelves
Pull-out shelves are a great solution to maximize your kitchen storage. They allow you to utilize every inch of space, making it easier to access items stored in the back of cabinets. This means no more bending or reaching into dark corners.
Start by measuring the dimensions of your cabinets. This ensures that the shelves will fit perfectly. You can purchase pre-made pull-out shelf kits or build custom ones from scratch.
- Measuring tape
- Shelf kits
- Wood planks
Once you have your materials, assemble the shelves according to the instructions. If you’re making custom shelves, cut the wood planks to size and attach the sliding mechanisms. Make sure they slide smoothly before installing them in the cabinet.
Install the assembled shelves inside the cabinets. Use a level to ensure they are even. Secure them with screws and test their functionality by sliding them in and out.
Now, organize your items on the pull-out shelves. Place frequently used items on the top shelves for easy access. Store heavier and less-used items on the bottom shelves.
Pull-out shelves not only improve your kitchen’s functionality but also keep it organized. This simple DIY project can be completed in a weekend and will make a noticeable difference in your daily kitchen activities.
DIY Project Idea 4: Mounted Pegboards for Utensils
Mounted pegboards are a fantastic way to keep your kitchen tools organized and within reach. This DIY project is both easy and effective, transforming your kitchen space. You can customize the pegboard to fit your style and needs.
Begin by selecting a suitable wall area for the pegboard. It should be easily accessible but not in the way. Common places include above your countertop or near your stove.
- Above countertop
- Near stove
- Inside pantry door
Purchase a pegboard and mounting hardware from your local hardware store. Cut the pegboard to fit the chosen space if necessary. Paint or decorate it to match your kitchen décor.
Next, mount the pegboard to the wall using anchors and screws. Ensure it is securely fastened to avoid any accidents. Use a level to make sure the pegboard is straight.
Finally, hook your utensils onto the pegboard using pegboard hooks. Arrange them according to frequency of use for maximum efficiency. This setup not only looks neat but also makes cooking more enjoyable.
Mounted pegboards are versatile and can be used for various kitchen items. You can hang pots, pans, or even small shelves for spices. This easy and affordable project greatly enhances kitchen organization.
Tips for Successful DIY Kitchen Projects
Undertaking a DIY kitchen project can be rewarding if you plan properly. Start with a clear vision of what you want to achieve. Sketch out your ideas or make a list of goals to keep yourself organized.
Gather all the necessary materials and tools before starting your project. This can save time and prevent interruptions in your work. Make sure to choose high-quality materials to ensure durability.
- Sketch your ideas
- Gather materials and tools
- Select high-quality items
Safety should always be a top priority. Wear protective gear like gloves and safety goggles when using tools. Also, make sure to have a first aid kit on hand in case of minor accidents.
If you’re not confident about certain tasks, don’t hesitate to seek help or advice. Sometimes watching tutorial videos or reading guides can provide useful tips. Even asking friends who have experience with DIY projects can be beneficial.
Pace yourself and tackle one task at a time. Rushing through the process can lead to mistakes and complications. Taking it step-by-step ensures you complete each part accurately.
Lastly, enjoy the process! DIY projects are not just about the end result but also the journey of creating something with your own hands. Celebrate small victories along the way as you see your kitchen transform.
Benefits of DIY Projects for a Functional Kitchen
DIY projects for a functional kitchen offer numerous advantages. They provide a sense of accomplishment and personalization. You can design your kitchen to suit your specific needs and preferences.
An organized kitchen can significantly improve efficiency. With customized storage solutions, finding ingredients and utensils becomes quicker and easier. This saves time and reduces stress during meal preparations.
- Improved efficiency
- Quicker access
- Reduced stress
DIY projects are also cost-effective. Hiring professionals for kitchen upgrades can be expensive. By doing it yourself, you can save a considerable amount of money.
Another great benefit is the potential increase in home value. Well-executed DIY kitchen projects can make your home more appealing to potential buyers. This is especially true if the projects enhance functionality and aesthetic appeal.
Finally, DIY projects can be a fun and rewarding experience. They allow you to be creative and develop new skills. Plus, there’s nothing quite like the satisfaction of completing a project with your own hands.
Frequently Asked Questions
Implementing DIY projects in your kitchen can enhance both its functionality and aesthetic appeal. Here are some common questions and answers to help guide you through the process.
1. What tools do I need for DIY kitchen projects?
For most DIY kitchen projects, you’ll need basic tools like a hammer, screwdriver set, measuring tape, and a drill. Other useful items include a level for alignment and safety gear like gloves and goggles to protect yourself while working.
If you’re doing more complex tasks such as cutting wood or installing heavy items, specialized tools like saws or electric screwdrivers might be necessary. Investing in quality tools ensures better results and makes your projects easier to complete.
2. How can I maximize storage space in my small kitchen?
Maximizing storage in a small kitchen involves creative use of vertical and hidden spaces. Install pull-out shelves or drawers inside cabinets to use the full depth efficiently, making it easier to access items that were once hard to reach.
You can also use mounted pegboards on walls to hang utensils, pots, and pans. Utilizing wall-mounted racks and under-shelf baskets can free up countertop space while keeping everything within easy reach.
3. Is it cost-effective to do kitchen upgrades yourself?
Yes, completing kitchen upgrades yourself is often more cost-effective than hiring professionals. You save on labor costs while customizing based on your preferences without compromising quality by carefully selecting materials.
This approach allows you to spread out expenses over time by tackling one project at a time. Many DIY projects also add value to your home by enhancing functionality and aesthetics at a relatively lower cost.
4. How long does it usually take to complete a DIY kitchen project?
The duration of DIY kitchen projects varies depending on the complexity of the task. Simple projects like installing drawer organizers may only require an hour or two of work.
Larger tasks such as building custom cabinetry or installing new countertops could take several days or even weeks if done part-time alongside other commitments. Proper planning will help set realistic timelines for each project component.
5. Can anyone attempt DIY kitchen projects, even without experience?
Yes, many DIY kitchen projects are designed with beginners in mind and come with detailed instructions that are easy to follow. Start with simpler tasks such as organizing drawers or painting cabinets before moving on to more complex endeavors.
If uncertain about any steps during your project completion—whether it’s purchasing materials or actual installation—consider seeking advice from online tutorials, how-to guides, or knowledgeable friends who have experience with similar activities.
Conclusion
DIY projects for a functional kitchen offer a perfect blend of creativity and practicality. These projects not only enhance the overall functionality of your space but also allow for personalized touches. Whether you’re installing custom drawer organizers or overhead pot racks, the benefits are substantial.
From improving storage solutions to making everyday tasks more efficient, DIY kitchen projects can significantly impact your daily routine. Moreover, they provide a sense of accomplishment and can even increase your home’s value. Embrace the opportunity to transform your kitchen into a more organized and enjoyable space.