

Ever noticed how clutter can evolve into a chaotic monster in just a few days? Tackling home storage issues with DIY projects isn’t merely a hobby; it turns frustration into satisfaction. Excitingly enough, 65% of homeowners have expressed a keen interest in DIY solutions for maximizing space.
Delving into DIY home storage projects, we find their roots deeply embedded in both resourcefulness and creativity. Historically, crafting personalized storage has been a blend of necessity and design innovation. With an increasing plethora of online tutorials and inspirations, transforming small spaces into organized havens is more accessible than ever.
The Rise of DIY Home Storage Projects
Over recent years, the popularity of DIY home storage projects has soared. This trend echoes the growing desire for personalized and unique home solutions. People are increasingly inspired to create their own storage spaces, both functional and aesthetically pleasing.
Social media platforms like Pinterest and Instagram play a significant role in this rising trend. They offer endless ideas and step-by-step guides for novices and experts alike. As a result, the barrier to starting a DIY project has greatly diminished.
Another reason for the surge in DIY projects is cost-effectiveness. Instead of purchasing expensive pre-made furniture, individuals can use affordable materials to create custom storage solutions. Personalization is another big draw, allowing people to tailor projects to fit specific needs and spaces.
The satisfaction derived from completing a DIY project is unparalleled. It provides a sense of accomplishment and pride in one’s work. Plus, transforming cluttered spaces into organized havens is both practical and rewarding.
Necessary Tools for DIY Home Storage Projects
Tackling a home storage project? The right tools are essential for success. These tools transform complex tasks into manageable activities.
Basic Hand Tools
First on the list are basic hand tools. A hammer, screwdriver, tape measure, and utility knife are must-haves. These tools form the foundation of any DIY project.
Every DIYer should have a set of wrenches. They are vital for tightening bolts and nuts. An adjustable wrench is particularly handy.
Pliers also belong in your toolbox. They help with gripping, twisting, and cutting wires. Needle-nose pliers are especially useful for reaching into tight spaces.
Power Tools
Power tools make many DIY tasks faster and easier. A cordless drill is one of the most versatile power tools available. It can be used for drilling holes and driving screws.
A jigsaw is another essential power tool. It’s perfect for cutting curves and complex shapes. Its flexibility makes it ideal for customized projects.
Consider investing in a sander as well. Sanding your projects ensures smooth finishes. Belt sanders are great for larger areas, but a palm sander works for most tasks.
Measuring and Marking Tools
Accuracy is key in DIY projects. Measuring and marking tools help achieve this. Always have a tape measure and a carpenter’s pencil at hand.
A level is crucial for ensuring your work is straight. Using a spirit level ensures that shelves and other installations are properly aligned.
Don’t forget a combination square. It’s useful for checking right angles and marking cut lines. Having precise measurements can significantly enhance the quality of your DIY storage solutions.
DIY Project: Crafting Storage Boxes
Creating storage boxes is a practical and enjoyable DIY task. These boxes can store anything from toys to books to craft supplies. Plus, they can be customized to fit any space perfectly.
Start by choosing your materials. Wood is a popular choice because it’s durable and easy to work with. You could also use cardboard for lightweight projects.
- Plywood or solid wood
- Nails or screws
- Wood glue
Next, measure and cut your materials. Precision is key to ensure that all parts fit together well. Once cut, the pieces can be assembled using nails and wood glue.
Finally, personalize your storage boxes. Paint or stain them to match your home decor. You can even add labels or handles for an extra touch of functionality.
DIY Project: Building Shelves
Building shelves is a highly rewarding DIY project. Shelves add both storage and style to any room. They can be crafted to fit any space, making them a versatile solution.
Start by gathering materials like wood, brackets, screws, and a level. Make sure to have all your tools ready, including a drill and a saw. Proper preparation will make the project smoother.
- Wood boards
- Brackets
- Screws
- Level
Measure and cut the wood to your desired shelf length. Make sure your cuts are straight and accurate. Misaligned pieces can compromise the stability of the shelf.
Next, attach the brackets to the wall. Use a level to ensure they are perfectly horizontal. This step is crucial for keeping your shelves even and secure.
Once the brackets are in place, mount the wooden boards on top. Secure them with screws, making sure everything is tight and stable. Reinforce weak points if needed.
Finish off by sanding and painting the shelves. This adds a polished look and can protect the wood from wear and tear. Customize the color to match your room’s decor.
DIY Project: Converting Unused Spaces for Storage
Transforming unused spaces into storage can maximize every inch of your home. Think of places like under the stairs or beneath the bed. These areas can offer valuable storage with a bit of creativity.
One excellent project is creating under-bed storage. You can build rolling drawers that slide easily underneath. This is perfect for storing seasonal clothing or extra linens.
- Wooden planks
- Casters
- Handles
Another idea is to use the space above doors. Installing shelves here can keep books, baskets, or decor items. It’s an often-overlooked area that can add substantial storage.
The space below the stairs is often unused. Adding cabinets or shelves here can create hidden storage for shoes, cleaning supplies, or kids’ toys. This makes the most of vertical space that would otherwise be wasted.
Don’t forget closet doors for hanging storage. Shoe racks, hooks, and over-the-door organizers can maximize closet space. These solutions are easy to implement and highly effective.
Upcycling Household Items into Storage Solutions
Upcycling household items into storage solutions is both eco-friendly and economical. This approach turns everyday objects into practical storage, reducing waste. Plus, it’s a creativity outlet for those who love DIY.
Glass jars are a versatile option for upcycling. They can hold anything from spices in the kitchen to craft supplies. Adding labels or paint can personalize these jars.
- Spice jars
- Craft containers
- Bathroom storage
Old shoe boxes can also be upcycled for storage. Cover them with fabric or decorative paper for a stylish look. They are great for organizing small items or paperwork.
Wooden pallets can be transformed into shelves or storage racks. With some sanding and painting, they can become rustic furniture pieces. This adds character and function to any room.
Even old suitcases can find new life as storage containers. Stack them to create a unique bedside table. They offer hidden storage space while adding a vintage touch.
Embracing Minimalism with DIY Storage
Embracing minimalism with DIY storage can transform your living space. Minimalist designs focus on simplicity and functionality. Less is often more when it comes to creating a serene environment.
The first step is decluttering your home. Identify items you truly need and either donate or discard the rest. This process alone can significantly free up space.
- Declutter regularly
- Donate unused items
- Recycle whenever possible
Selecting multifunctional furniture is another key aspect of minimalist living. Think of ottomans that provide seating as well as storage. These pieces reduce the amount of furniture needed.
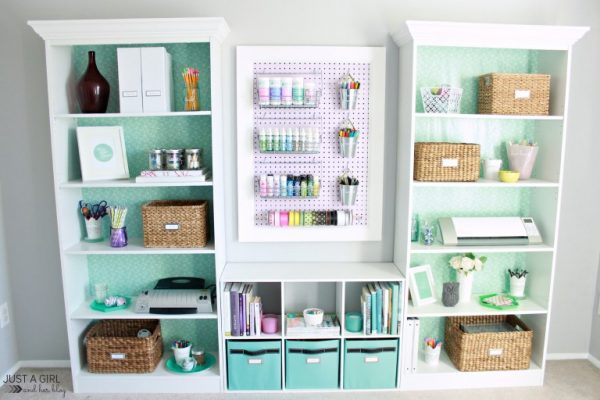
Shelves are excellent for displaying only what matters most to you. Opt for open shelving units that encourage you to maintain organization. This keeps visual clutter at bay while adding style to your home.
Baskets and bins help in concealing items neatly. Place them on shelves or under tables for easy access while keeping things out of sight. Choose neutral colors to blend seamlessly with your decor.
Maintaining and Organizing Your New DIY Storage
Maintaining your new DIY storage is essential for long-lasting functionality. Regularly check for any wear and tear on your storage solutions. This ensures they stay in top condition.
Cleaning your storage units should become a routine task. Dust and debris can accumulate quickly. A clean storage space also makes finding items easier.
- Dust regularly
- Vacuum corners
- Wipe down surfaces
Organizing your new storage can greatly enhance its efficiency. Use labels to identify what’s stored where. This small step can save you time and frustration later on.
Consider using dividers or baskets within larger storage units. These help in keeping similar items together. An organized space is a more functional space, making daily tasks simpler.
Periodically reassess what you store. Items that are no longer needed should be removed. This helps in keeping your storage uncluttered and efficient.
Frequently Asked Questions
Discover answers to common questions about DIY home storage projects. Get tips and insights on optimizing your space efficiently.
1. What basic tools do I need for DIY home storage projects?
Essential tools include a hammer, screwdriver, tape measure, and utility knife. These are the basics for most DIY storage projects.
Additionally, having pliers, wrenches, and a level can be incredibly helpful. A cordless drill is also a versatile tool that makes tasks easier.
2. How can I repurpose household items into storage solutions?
You can upcycle glass jars to store spices or craft supplies. Cover old shoe boxes with fabric or paper to organize small items.
Wooden pallets can be turned into shelves or furniture with some sanding and paint. Even old suitcases can become unique storage containers or tables.
3. What are some creative ideas for under-bed storage?
Create rolling drawers that fit neatly under your bed. This makes it easy to store seasonal clothing or extra linens out of sight.
Baskets and bins are also practical options for storing shoes or toys. The key is to keep everything accessible, yet hidden when not in use.
4. Why should I consider building my own shelves?
Building your own shelves allows you to customize them to fit specific spaces perfectly. This is especially useful in rooms with odd dimensions or limited space.
Shelves add both storage and visual appeal to any room. They help utilize vertical space effectively, increasing overall storage capacity without taking up floor area.
5. How do I maintain my new DIY storage solutions?
Regularly check for wear and tear to ensure longevity. Cleaning should be routine; dusting and wiping down surfaces helps keep things tidy.
Organizing is equally important. Use labels, dividers, and baskets within larger units to keep everything in its place and easily accessible.
Conclusion
DIY projects for creating home storage are a smart way to maximize your space while adding a personal touch. They offer practical solutions and allow you to customize your home according to your needs. Plus, the satisfaction of completing a DIY project is unmatched.
From crafting storage boxes to converting unused spaces, the possibilities are endless. With the right tools and a bit of creativity, anyone can transform cluttered areas into organized, efficient spaces. Dive into your next DIY storage project and see the difference it makes!